
22 Easy Real Estate Photography Tips for Real Estate Agents
- 27 Sep 2023
- Real Estate Marketing
- agentcrate
Follow these easy real estate photography tips if you’re taking your own photos of your listings to make them look like a pro took them!
Real estate photography is more than just snapping a few pictures of a property. It’s an art form that requires skill, planning, and a keen eye for detail. A well-photographed listing can be the difference between a quick sale and a property that lingers on the market.
For both newcomers and seasoned real estate agents, mastering the art of real estate photography is crucial. It’s not just about making the property look good; it’s about showcasing it in a way that appeals to potential buyers. A well-executed photo shoot can highlight the best features of a home, making it irresistible to prospective buyers.
BEFORE YOU START
Before we get into the best real estate photography tips – you’ll want to make sure that your seller or client has prepped the listing for the photos. Here are some tips to give your client to ensure the property is photo-ready:
1. Remove all clutter from the property. This includes personal belongings, furniture, and any other objects that will take away from the features of the home.
2. Make sure all windows are clean and free of smudges or streaks.
3. Ensure that the property is neat and tidy – this means mowing the lawn, trimming the bushes, and clearing away any leaves or debris.
4. If the property is vacant, consider hiring a professional home staging to make it look its best.
Now that the property is ready for photos, it’s time to capture some amazing shots! Here are some tips to help you:
20 GREAT REAL ESTATE PHOTOGRAPHY TIPS
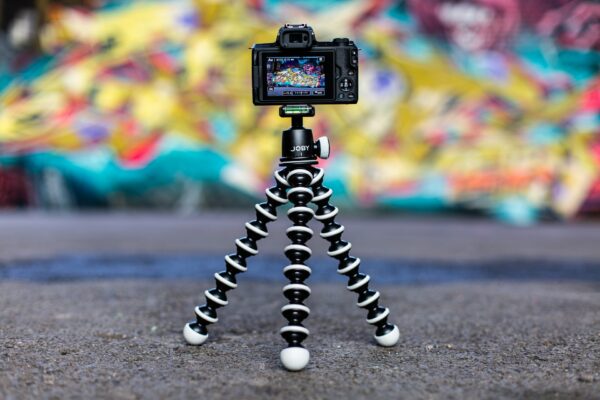
1. Use a tripod.
This is one of the most important real estate photography tips for making your photos look professional. A tripod will help you to keep your camera steady, which is essential for obtaining clear, sharp photos.
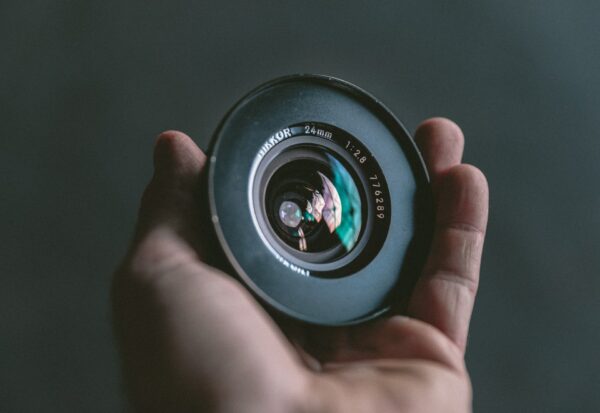
2. Use a wide angle lens.
This will help you to capture more of the room in each photo.
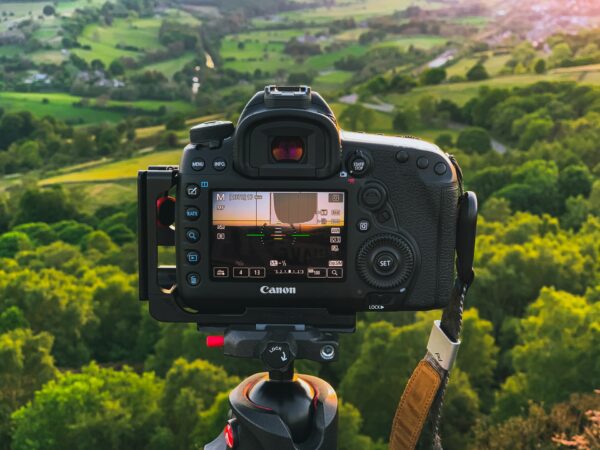
3. Shoot during the daytime.
Natural light is always best for real estate photography. Shooting during the daytime will help you to capture the best light and achieve the most flattering results.

4. Avoid shooting at night.
If you have to shoot a listing after dark, make sure you use a tripod and a flash.

5. Mind the angles.
When shooting a room, make sure to take into account the angles of the walls and furniture. This will help you to capture the space in the most flattering way possible.

6. Take Photos of Amenities and Features
Make sure to take photos of the homes’ amenities such as the pool, outdoor kitchen, or other unique features of the property.

7. Use a ladder or a drone.
If you want to include the roof or the yard in a photo, you’ll need to use either a ladder or a drone.

8. Use natural light.
Since you are shooting during the day, make sure that your windows are uncovered so they can let in lots of natural light. If you shoot at night, cover your windows with dark paper to create the right atmosphere.

9. Photograph Community Amenities
If the community has awesome amenities such as a golf course, tennis courts, clubhouse, or other features – make sure not to forget to take photos of those too!

10. Use a good camera.
If you want to take great real estate photos, you need a good camera. This doesn’t have to be an expensive DSLR camera, but it should be something that is capable of taking high-quality photos.
11. Use a zoom lens.
If you don’t have a wide angle lens, use a zoom lens to get close-ups of the rooms you are photographing.

12. Create an album on your camera.
This is a great tip for making sure you capture lots of usable shots at each property. Constantly taking photos will increase the odds that you’ll capture the perfect shot every time.

13. Ambient Lighting
Turn the lights on in the room to showcase amazing lighting.

14. Use HDR photography.
HDR photography can be a great way to capture the true colors and lighting of a room. It can also help you to create photos that look like they’ve been professionally edited.
15. Do not Include personal items in the photos.
If there is anything that belongs to your clients, be sure to remove it from your photos so potential buyers can imagine themselves living there.
16. Shop for the right props.
Make sure you keep a supply of disposable and reusable props on hand so you can dress up each room for your photo shoot.

17. Use a reflector.
A reflector can be a great way to bounce light onto dark areas of a room and create a more pleasing photo.
18. Avoid shadows.
If possible, avoid having any shadows in your photos. This will make them look more polished and professional.
19. Take lots of photos.
This is probably the most important tip of all – always take lots of photos! You never know which one will be the perfect shot.

20. Use real estate-specific photo editing software.
If you want to take your real estate photography to the next level, consider using a photo editing software specifically designed for real estate professionals. These programs can help you to improve the quality of your photos and make them look more polished and professional. Some examples of popular editing software are Adobe Photoshop and Adobe Lightroom.

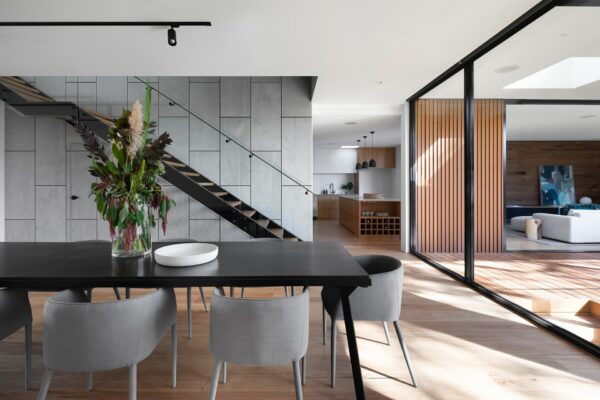
21. Staging
Staging is an often overlooked but crucial aspect of real estate photography. It’s not just about making a space look pretty; it’s about creating an environment that allows potential buyers to envision themselves living in the home. A well-staged home can make your photographs pop and give your listing a competitive edge.
- Declutter: Remove any unnecessary items from countertops, tables, and floors. A clean space looks larger and more inviting.
- Neutral Palette: Stick to neutral colors for decor and furniture. This makes it easier for buyers to imagine their own belongings in the space.
22. Composition
Composition is the arrangement of elements within your photograph. It’s what guides the viewer’s eye and makes a photo aesthetically pleasing. Poor composition can make even the most beautiful homes look unappealing, so it’s essential to get it right.
- Rule of Thirds: Imagine your image is divided into nine equal segments by two vertical and two horizontal lines. Try to position the most important elements along these lines or at their intersections.
- Multiple Angles: Don’t just shoot from the doorway. Capture each room from various angles to provide a more comprehensive view of the space.
- Vertical Lines: Make sure the vertical lines in your photos are as straight as possible. This is especially important for shots that include walls and doorways.
Now that you know how to take great real estate photos with these real estate photography tips, it’s time to put your skills to the test! Shoot some listings and see how your photos compare to those of other professionals in the industry. With a little practice, you’ll be able to produce photos that will help you to sell properties faster and at a higher price!
WHEN TO HIRE A PROFESSIONAL REAL ESTATE PHOTOGRAPHER
Real estate photography is very different from other types of photography. Because you are shooting real estate listings, it’s important to take photos that highlight the features and benefits of each property. This requires a lot of skill and practice. While anyone can learn how to take good real estate photos using the real estate photography tips mentioned above, it might be a good idea to hire a professional photographer if you want guaranteed high-quality results.
Real estate photographers have the experience and equipment necessary to take great photos of your property. They will also know how to edit your photos so they look their best. If you’re looking to make a good impression on potential buyers, hiring a professional is a sure-fire way to do just that.
WHERE TO FIND REAL ESTATE PHOTOGRAPHERS
If you want to hire a professional real estate photographer, there are lots of places where you can find one. Here are some of the most popular options:
• Real Estate Photography Associations – There are many different real estate photography associations across the country. These associations are a great place to start your search for a photographer, as they typically have directories of member photographers.
• Portfolio Websites – There are many professional photographers who have websites where you can view their portfolio of work. This is a great way to get an idea of their photography style.
• Online directories – There are many online directories where you can find photographers, such as The Photographer’s Guide and Photographers.com.
• Referrals – Ask your friends or family members if they know any good real estate photographers. Chances are, they will know someone who does this type of photography.
WHY USE A PROFESSIONAL REAL ESTATE PHOTOGRAPHER?
If you have no experience taking real estate photos, it’s a good idea to hire a professional to take them. Real estate photography requires specific skills and equipment that your average amateur might not have access to. In the hands of an experienced professional, your photos will look polished and high-quality – which is exactly what you want for your listings.
In addition to taking great photos, real estate photographers can also help with post-processing. This means that they can edit your photos to make them look even better. By hiring a professional photographer, you can be sure that your photos will be of the highest quality and will help you to sell your property faster.
So, what are you waiting for? Start shooting some great real estate photos today!
If you’ve enjoyed this article about real estate photography tips.- make sure to read more! And also, make sure to check out all that Agentcrate has to offer – the
best real estate marketing plans available!
FAQ’s – real estate photography tips
How many photos should I upload to MLS?
You should upload as many as your MLS allows. Many MLS’ allow up to 50 photos now. Take advantage of showcasing your new listing as much as possible.
How do I get my listing photos approved by the MLS?
Your listings agent should be able to provide you with a photo submission checklist that will help you to ensure that your photos meet the requirements of the MLS. If you are having trouble getting your photos approved, it may be helpful to consult with an experienced real estate photographer.
Can I use my own photos on my website or marketing materials?
Real estate photos can be copyrighted, so it is important to make sure that you are using photos that you have the legal right to use. If you want to use your own photos on your website or marketing materials, it is best to consult with an attorney who specializes in copyright law.
What should I do if my client wants me to take photos of their home at night?
Trying to shoot a home in poor lighting can create unpleasant photos that don’t do the property justice. If your client is adamant about having professional photography done at night, be sure to use HDR or multiple exposures to make sure you capture the best shots possible.
Related articles you may like:
-
Holiday Gift Ideas for Real Estate Clients

The holiday season will be here before we know it. As a real estate agent, this is the perfect time to show your clients some appreciation through thoughtful gifts. Finding meaningful gifts that demonstrate your gratitude, and strengthening those client relationships in the process, should be a priority. In this post, we’ll explore 10 great…
-
The Ultimate Guide To Fall Pop By Ideas For Real Estate

As the crisp autumn air settles in and leaves paint the landscape with vibrant hues, real estate professionals face a unique opportunity to leverage the season for business growth. In this comprehensive guide, we’ll explore how realtors can harness the power of “pop-bys” – a time-tested yet often underutilized marketing strategy – to build lasting…
-
How to Capture Leads on Your Website in 2024 – Real Estate Edition

As a real estate agent in today’s digital landscape, your website serves as the cornerstone of your online presence. It’s not just a digital business card; it’s a powerful tool for generating leads and growing your business. However, simply having a website isn’t enough. To truly succeed, you need to optimize your site to effectively…